
While indoors, place your dried emulsion paper and transparency under glass. I always put the transparency ink-side down to retain as much detail as possible in the print.
Exposure
Gum bichromate emulsion is sensitive to the high energy of ultraviolet light. While I'm no chemist, I have pieced together what is actually happening during exposure. The emulsion on our paper is slowly oxidizing, just like iron will rust or apples turn brown exposed to the air. The emulsion that becomes oxidized can no longer dissolve in water and stays permanently adhered to the paper surface. Usually this takes 3-4 days, and believe me I've ruined a print or two by not completing it in time.
When you expose your emulsion to UV light, the oxidization process takes a matter of minutes. In the clear parts of the transparency where the emulsion gets exposed to UV light, those areas will adhere to the paper surface.

supplies used in this step
- Emulsion coated paper (2 sheets: one for a test print, one for the real print)
- Inkjet negative
- contact printing frame
- Sunlight or other ultraviolet light source
- timer
- sheet of cardboard or other opaque material
You will need:
Exposure by Sunlight: Test Print
Just about everyone has access to sunlight at one time or another, unless you live in Alaska. As a strong ubiquitous free plentiful source of UV light, the sun is a great thing to start printing with.
Before we make our real print, we will need to make a test print to discover what exposure time will look best for our image. If you have ever worked in a darkroom you will be familiar with the process.


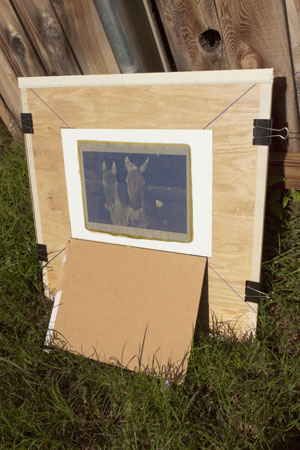
I use four large office binder clamps to hold a sheet of glass snugly against a flat piece of oak at each corner.

Use a sheet of cardboard or other opaque material to cover the glass and print before you are ready to expose. Place your printing frame perpendicular to direct sunlight. For this example I was exposing by print around 5:30pm so the sun was getting lower in the west. I needed to lean the frame against a fence post in the backyard. The ideal time to print would be between 10am to 2pm when the sun is high in the sky, but as long as it is clear and sunny it will work.

Most exposure times in sunlight are 5 minutes or less for me. I've set the timer to 30 seconds to test various exposure times in 30 second increments.

Using the piece of cardboard, expose one small area for 30 seconds. I usually start at the left using vertical bands of exposure, but sometimes an image requires you test using horizontal bands.

After the 30 seconds, move the cardboard over another slice and expose for another 30 seconds. Your first area will now have been exposed for 60 seconds. Continue the process across the print.

After exposing the entire print in 30 second increments, cover it all up with the cardboard to prevent further exposure to sunlight. Bring it back inside to develop your test print!
If you have not learned about development yet, skip ahead to the next section on development and come back.
Exposure by Sunlight: Print

Once your test print is developed you can get a reasonable idea of what exposure time will look best for your image. The image received the most sunlight exposure time on the left, and the least (only 30 seconds worth) on the right.
Determining which time to use is entirely subjective. There are aesthetic reasons and technical reasons why one would under or over expose. For this example I chose 2 minutes as it seems to provide a nice balance of tones from detail in the clouds and detail on the horse.
Place your second emulsion sheet beneath the negative and glass as before. Bring the frame outdoors and set it up angled toward the sun just as before, and let your print expose for the time you determined in your test. I'm letting mine go 2 minutes.
Often a cloud or something may obscure the sun for part of your exposure. Just give your exposure another 15 seconds or so.
It is possible to expose prints on hazy days, partly cloudy days, and even overcast days. Granted your exposure times may be much much longer.
A great excuse to crack open a beer!
UV Exposure Unit: indoor printing

Ultra violet exposure unit
Often the weather is not suitable for printing. As I write this tutorial it is rainy outside, very gloomy, no sunlight. I also find that I'm very busy during the daylight hours and have more time to print in the middle of the night (in fact I'm somewhat notorious for printing at 2am). Here in Texas the summers have been reaching 108 degrees, certainly not very comfortable. In Texas the weather can turn on a dime and before you know it you and your print are being pelted by hail!
While I've never been pelted by hail while printing, the whether is not very consistent and very unreliable. For more advanced printing techniques you may desire consistency and reliability with exposure times.
Fortunately there are other sources of UV light a gum printer can use. Several years ago I built what I call an "ultraviolet exposure unit". Essentially it is an array of UV lights beneath a small table. Currently mine is suspended to provide a larger coverage area. If you are handy, you may be able to build one yourself. I have built these for others for a price. Once I have the resources, I may begin building these for anyone interested.