
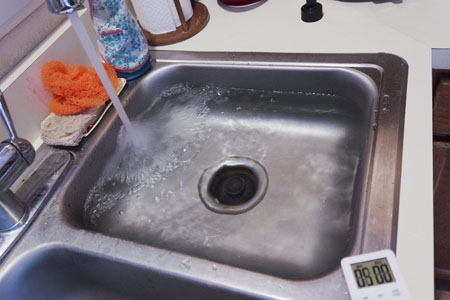
Start by filling a sink or bathtub with a few inches of water. I use a bathtub for my larger prints. The temperature of the water changes the speed at which something will develop. I find a temperature of around 90-100 degrees F works well. It is also comfortable on your hands, not too hot or cold. I use my hands to judge the temperature.
Develop and Done
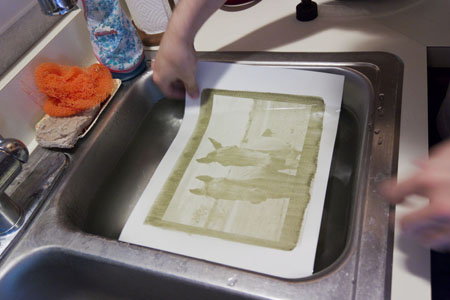
Development is where the magic happens. The first few times you make a print it's almost supernatural to watch the pigment fall off the paper and leave an image behind.
During this final step in the process, you will be soaking your print in water. Any emulsion that was not exposed to ultraviolet light will slowly dissolve into the water, revealing the paper surface beneath. When I first started printing I would simply put my print underwater for a while and hope for the best. Over the years I have settled on a two stage method that I rarely change which helps reduce problems like staining.
- exposed print
- sink or bathtub
- timer
- brushes or other tools (optional)
You will need:
The 2 Stage Development Process
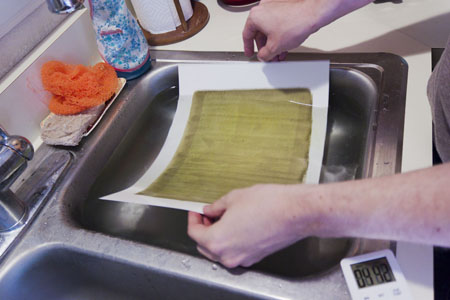
The first stage lasts 5 minutes. Set a timer and slide the paper in face up. Slowly slide the paper in and out of the water. This gentle agitation keeps clouds of pigment from soaking into the paper muddying up the highlights of the image. Almost immediately you will see the ammonium dichromate dissolving off into the water as yellow clouds. Remember the dichromate is poison, so you may wish to wear gloves. The dichromates are very diluted at this point so I use my bare hands, but I am careful to wash them after development.
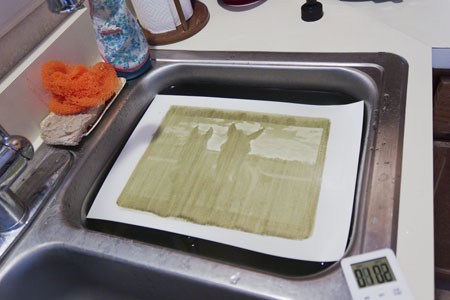
Usually after 3-4 minutes of gentle agitation, the highlights of your image will have dissolved away. Sometimes this does not happen and sometimes it happens immediately. The older the emulsion is, the longer it seems to take to develop.
During development the emulsion is soft and slippery. It feels like algae slime, but don't touch! It is extremely fragile and can easily be damaged. I always hold the paper from the edges.

At the end of the 5 minutes, the image will likely look too dark but remember it is not finished developing yet. Drain the dirty water while holding or hanging the print over the sink and set the timer for 20 minutes.
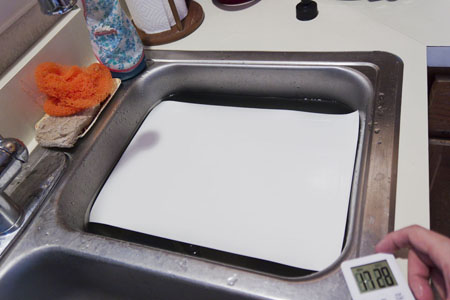
Refill the sink with fresh warm water. In this second stage of development the print is going to 'clear'. You may notice the highlights of your image are a bit yellowish. By allowing the paper to soak in warm water any remaining dichromate will clear out the yellowish tint.
Gently slide the paper in and out of the water perhaps once or twice, and then let it float face down. Start the timer for 20 minutes and go have another beer!
After 10 minutes or so I check on the print. Sometimes at this point I may manipulate the emulsion using tools like brushes.
After the full 20 minutes are up, the image will have continued developing and it will appear lighter. If your test was correct earlier, it will look exactly how you had hoped!
Drain the sink. Rinse your hands.

Hang your print somewhere to dry. Usually the drying takes several hours. If you just made a test print, you have a pretty good idea of how it will look and can evaluate it at this point. Wet prints seem to be a little darker, but only form the optical effect of being wet.
Finished Print

The final print after it has dried
Once the emulsion is dry it is essentially permanent. You can leave it as is or even print another layer of gum bichromate on top.
For this print I used a raw umber and some gray pigment. I feel it is a little too light for my tastes, and the color is odd, but the process surely worked! Just remember if this is all you get on your first try, do not despair. Just try again and you'll get it!