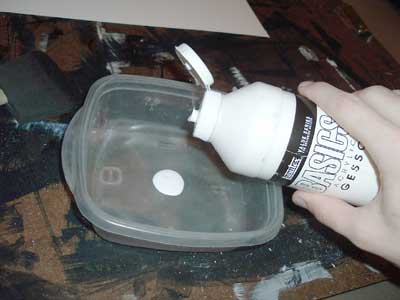
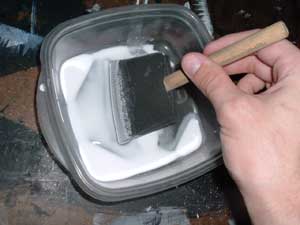
I usually prepare two 11x15inch sheets at a time, or one large 18x24inch sheet. I squeeze out a bead of gesso into my mixing tray about the size of a quarter and then add the according amount of water. I find that a 1:2 ratio of gesso to water works best for me and the paper I'm currently using. I double the amounts to 2 parts gesso 4 parts water for coverage of a large sheet. Precision is not terribly important, I eyeball the measurements
The Problems: Many

Turns out that preparing paper is the solution to many problems involved with gum printing. The first year or two I made gum prints I did little or nothing to prepare my paper. Many times a print would look great during development, but then as the print was drying any remaining pigment would seep into the fibers of the paper to be trapped there forever, staining and clouding up the whites of my image. Staining would also occur during development, pigment in the water would seep back into the paper, or maybe sneak around the backside creating blotchy patterns. There were several factors causing these problems, but the main culprit was using un-sized paper.
Sometimes this can be a desired effect as with my print 'Tree and Roots' seen to the right. Often the cheaper watercolor papers appear to have barely adequate sizing so additional sizing is required to maintain clear highlights. Reducing the staining effects of pigment on paper means more light reflects up off the paper translating to brighter and clearer images. Color images also appear brighter and more saturated after sizing.
To 'size' paper means to protect a surface from soaking up whatever is on it (not measure its dimensions or something like I once thought). Artists size their canvas and papers with a variety of concoctions, sometimes using rabbit skin glue, or gelatin, or Gum Arabic even! Oil painters, for example, size their canvas so that their oil paints do not seep into the fibers causing staining or deterioration. Many famous abstract painters in the 1950s did not size their canvas and have caused quite the nightmare for collectors and museums some 60 years later as the pieces are slowly deteriorating.

My first conclusion was to size my watercolor paper using a solid layer of white gum bichromate emulsion. And in an early attempt at a multi-colored gum print, the technique seemed to succeeded marvelously! However, my success was only one of luck and chance. In several more attempts I used Chinese White pigment for the base layer, or sometimes Zinc White. I found that I had to load nearly 4 or 5 times as much white pigment as normal to make the layer opaque enough to do any good. And even then the results were wildly unpredictable.
After all that, staining from the backside would still happen when I added a few more layers. My white paper base would also be slightly stained by pigments as well, turning to a dingier color then the paper base. Gum print layers are also slimy, giving successive layers a chance to flake off in annoying little bits during development. It certainly didn't help to coat my entire print with a slimy surface in the first place.
I needed something to seep into the fibers of the paper first, and keep pigments from ever working their way in. Every source I turned to for help suggested using plain old gelatin to size the paper. I was sure that would work as people had been doing it for a century. The trouble with gelatin is, it too dissolves in water. You need to harden the gelatin with a formalin solution (basically formaldehyde). Even more troubles: I couldn't find anywhere to buy formalin. I still can't! Formalin also is a dangerous toxic substance that I didn't want to start using.
The Solution: Acrylic Gesso

Through arduous trial and error I finally found a wonderful simple solution: diluted acrylic gesso! There was no staining after a dozen layers! And it is not slippery either like a layer of white emulsion! It is also far safer for your health.
For the last several years using gesso has worked wonders in my prints. Oddly I had tried gesso before as a sizing agent and swiftly disregarded it. My gum layers slid right off the gesso during development and I had tossed the idea aside. When I tried again over 2 years later I had the epiphany to dilute the gesso in water so it could seep into the paper. Low and behold, it worked and my whites were clear and clean! However, too much dilution with water brings the stains right back.
The image to the right shows different ratios of gesso to water starting with 100% gesso at the bottom. As you can see with 100% gesso the paper surface becomes too smooth and the emulsion flakes of during development.
With too much water in the sizing the staining comes back, clouding up your prints more and more with each successive layer.
How to size paper with Gesso


I then use a sponge brush to mix the gesso and water together until it resembles milk. In time, the gesso accumulates in the brush, so I use different brushes later when coating emulsions.

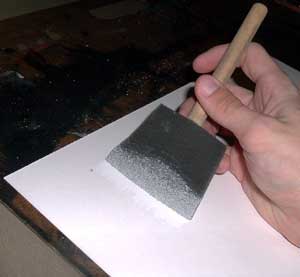
Coat an even layer of the diluted gesso on most of the paper. I usually leave a dry 1 inch border or so around the edges to handle the paper without getting white finger prints everywhere.
The gesso is very white and difficult to see on white paper. Using the glare from a lamp helps to see where the gesso has been applied and where it has not. I will brush over the area vertically and horizontally repeatedly, allowing the sizing to soak in evenly. I never press too hard, as this could easily damage the wet paper.

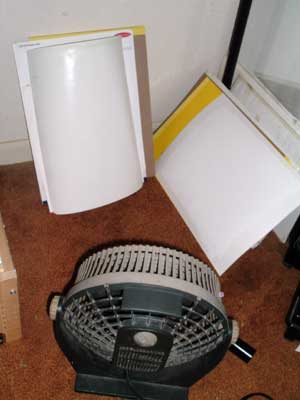
Then, you set the prints aside to dry. I dry mine with a fan blowing on them to speed up the drying process. Acrylic takes a short time to feel dry, but it will not be completely dry deep in the fibers of the paper until several hours later. So I always coat a few sheets ahead of time. (You also might avoid drying your prints on carpet as I am in this photograph)
That's Not all Folks!
Pre-Shrinking Paper
If you plan on printing more then one layer of gum bichromate on a single print, it is a good idea to pre-shrink your paper. When aligning a transparency for a 2nd or 3rd layer of printing, you will find the paper has changed size! Just like laundry, paper is made of fibers that can contract and shrink! The solution to this problem is to shrink your paper before you print anything on it. Pre-shrinking does not completely eliminate slight misalignments of your transparencies in later printings, but it does significantly reduce the problem.
After the gesso sizing is dry, all you have to do to pre-shrink paper is soak the paper in warm or hot water for a while and then hang it to dry. I let mine soak for 20 minutes or so, agitating it every so often. I usually pre-soak about 2-8 sheets of paper at one time in my bathtub. I then hang the shrunken sized paper to dry. It may be beneficial to repeat this step (ultra-pre-shrinking?) but I never found this necessary.
